Setting up a new (blog-) home for my build log
Hi,
After starting a build log for this project on another platform a few years ago, I ran into issues with how the blog was organized there. So I decided to move my build log for my DIY flight sim cockpit here.
I’m hoping this move will make it easier to post updates more regularly and keep track of the project’s progress. I’ll be moving my existing posts over from the old build log and then share an update on where the project currently stands, along with the next steps.
So, here’s what’s happened so far…
The Beginning
Piper Arrow III Sim Cockpit
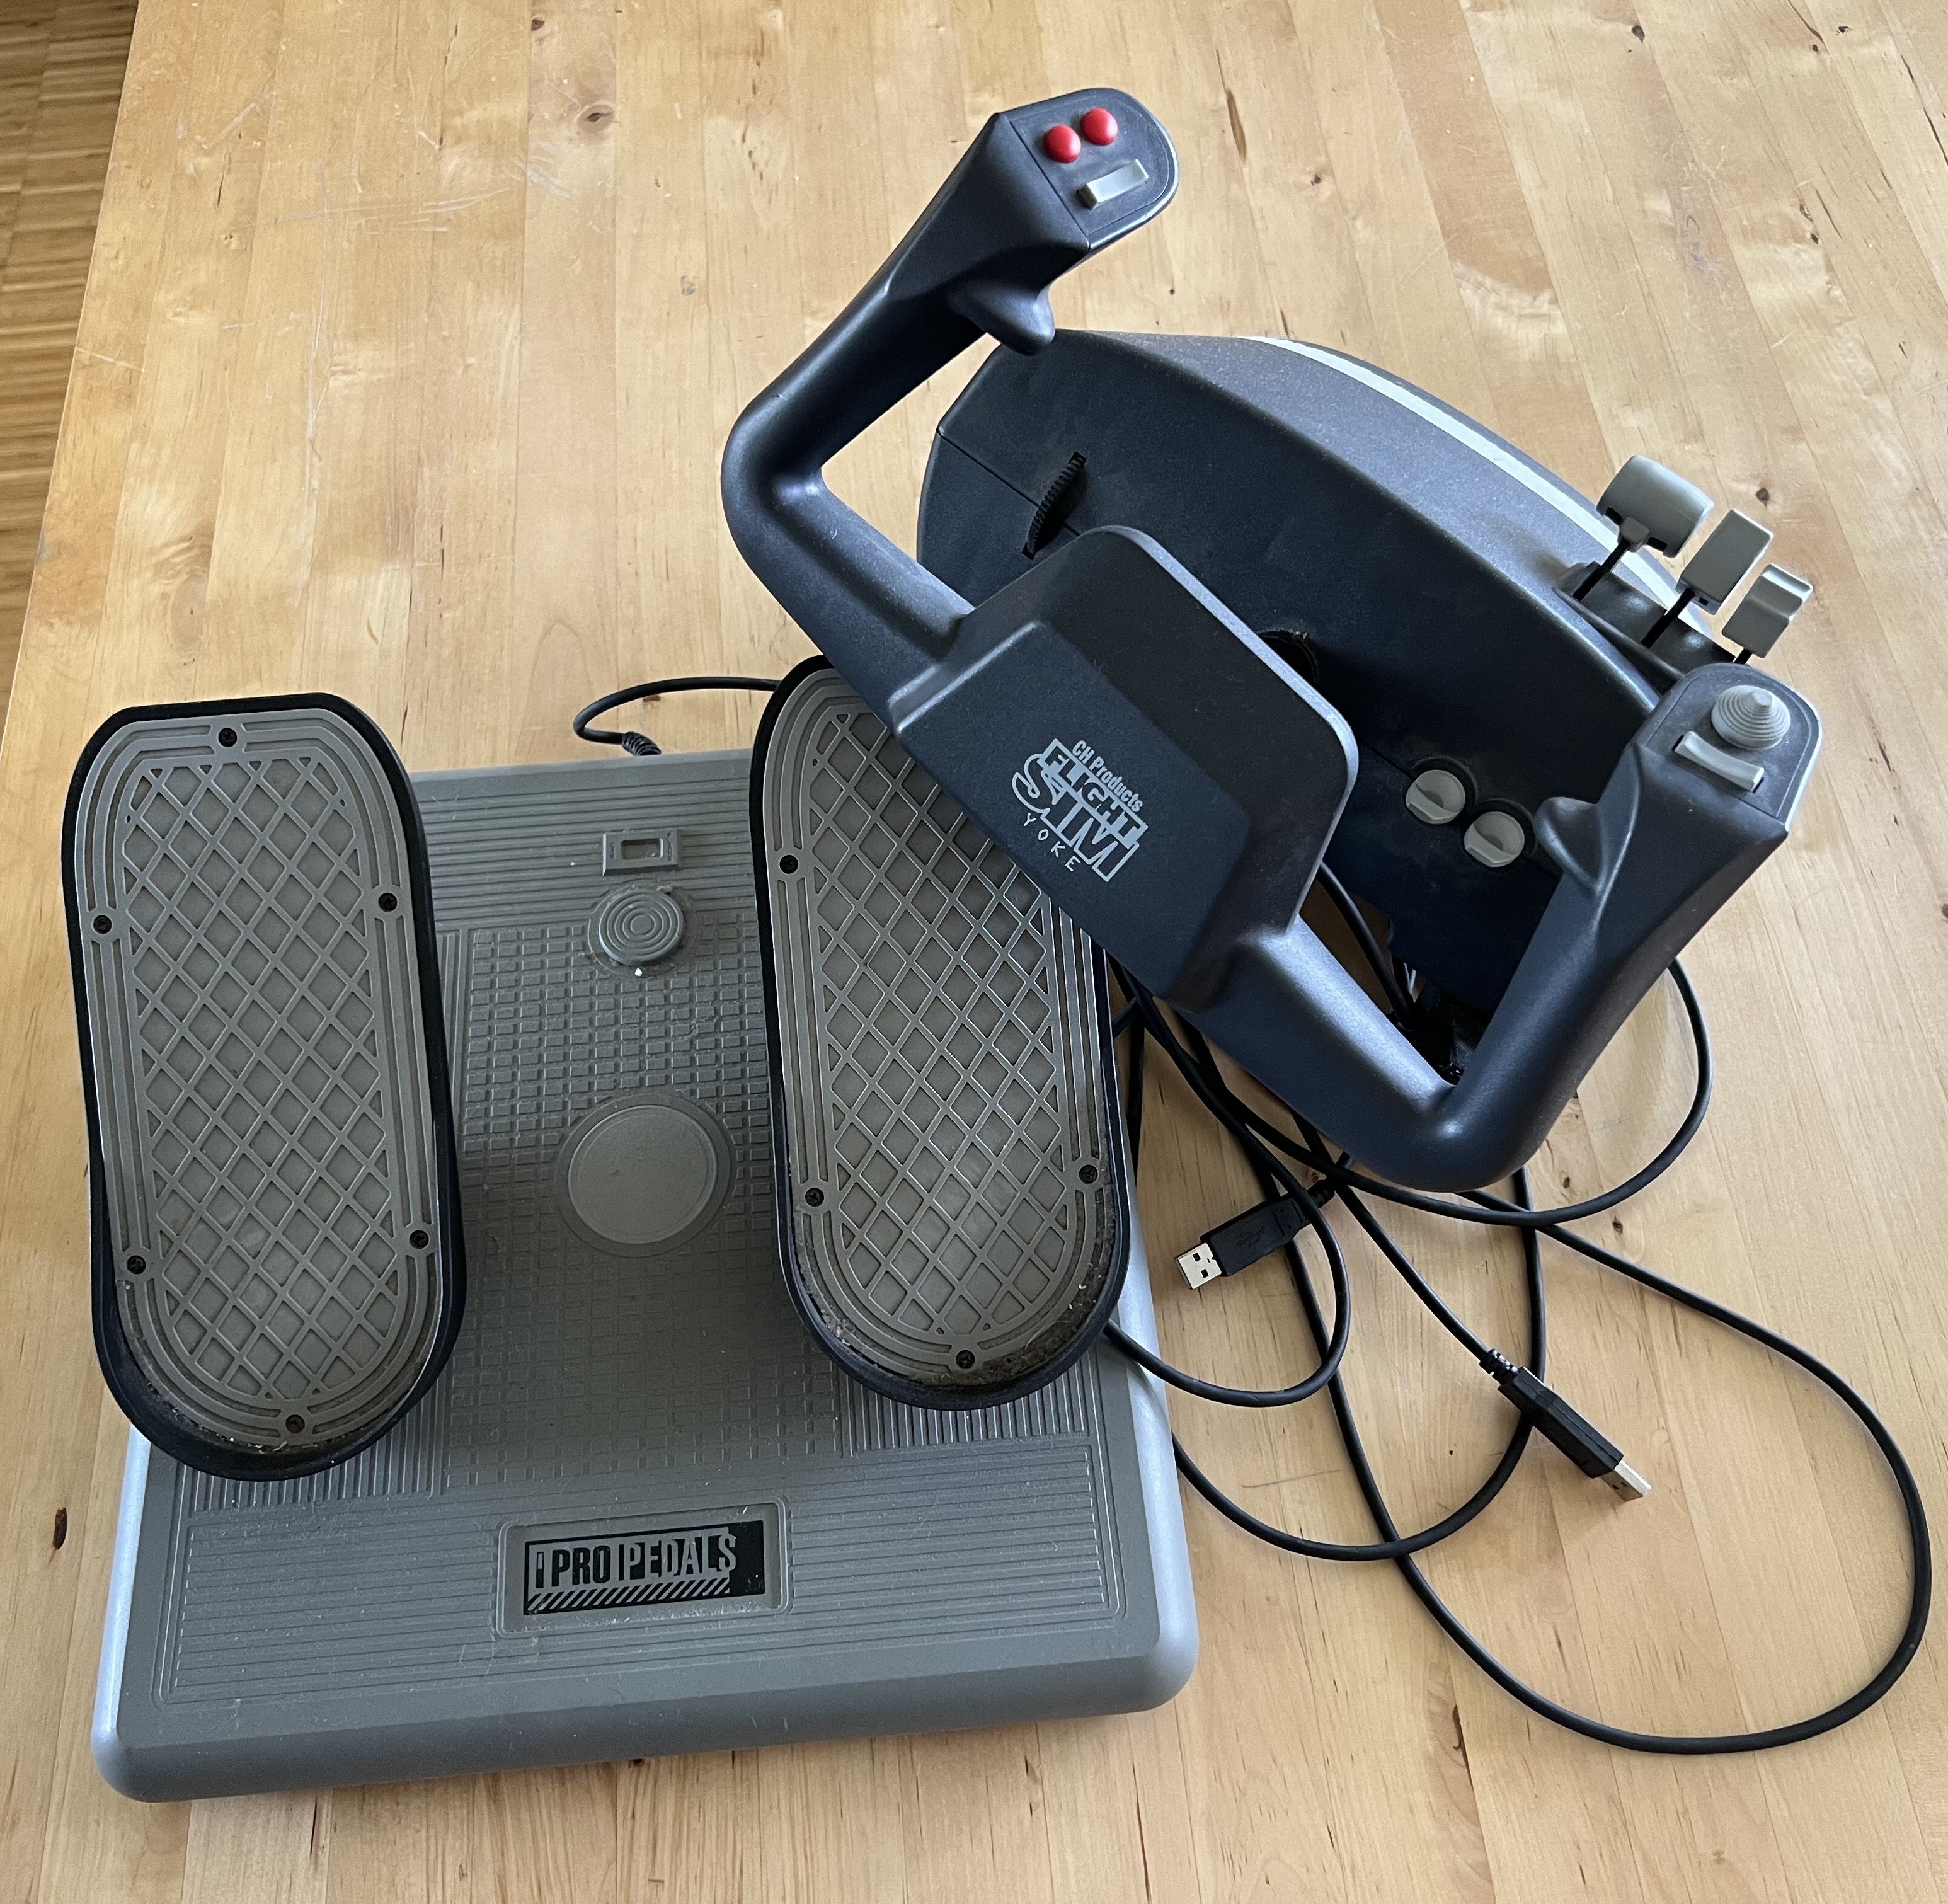
Originally, I set out to build a dashboard for a Piper Arrow III for use with flight simulators. The idea was to keep it modular so it could be set up and taken down easily on a desk, since I didn’t have space in my apartment for a full, stationary cockpit. The setup was meant to be centered around my CH Products yoke and rudder pedals, which I had already owned for years.
Since then, the scope of the project has evolved quite a bit and grown beyond that initial plan.
Why I‘m doing this?
After many years of taking a break, I returned to my old hobby, "flight simulation," a few weeks ago. I found my over 20-year-old yoke and rudder pedals from CH Products in the basement and renewed my license for the latest version of X-Plane. After a few test flights, I noticed again what had always bothered me about flying with flight simulators: operating the flight instruments with a mouse on the screen.
Especially in “stressful situations,” it is extremely annoying to hit tiny controls with the mouse. It not only breaks the immersion when you suddenly have to tilt and scroll the viewing angle on the screen to look at some instrument, but often the slightest misclick means that complete settings in the GPS or transponder are reset or end up in completely different settings.
This is particularly annoying when using real-time ATC (e.g., through VATSIM) in the flight simulator, because not only do you frequently receive external instructions for navigation or radio communication, but you also no longer have the option to simply press the "Pause" button without ruining the simulation for all involved controllers and other sim pilots.
Therefore, my goal is to replicate the entire dashboard of a Piper Arrow III so that all instruments that function mechanically in the real airplane are also mechanically built in my dashboard. I'm not a fan of solutions where a monitor is simply placed behind a wooden board with appropriate cutouts. Of course, there are also "non-mechanical" devices in the cockpit, such as GPS. These will also have screens in my build, of course. Whether it's a mechanical or electronic instrument, the most important thing for me is that all the controls are mechanical. No virtual buttons or touchscreen elements.
What am I doing?
(This was the original plan, which has since grown into something much more extensive… more on that in a later post.)
Well, here's a screenshot of a Piper Arrow III Dashboard in X-Plane:

And I’m trying to build most of it.
As mentioned before, I already own a yoke and rudder pedals, which work fine, and I currently don’t intend to build these from scratch.
This might be different if I were planning to build a full cockpit, but unfortunately there’s no space for that in my apartment (foreshadowing…). So it’ll be a desktop cockpit, and the existing yoke with its tabletop screw clamps works great for this use case.
Based on the screenshot above and the existing hardware, I came up with this layout:
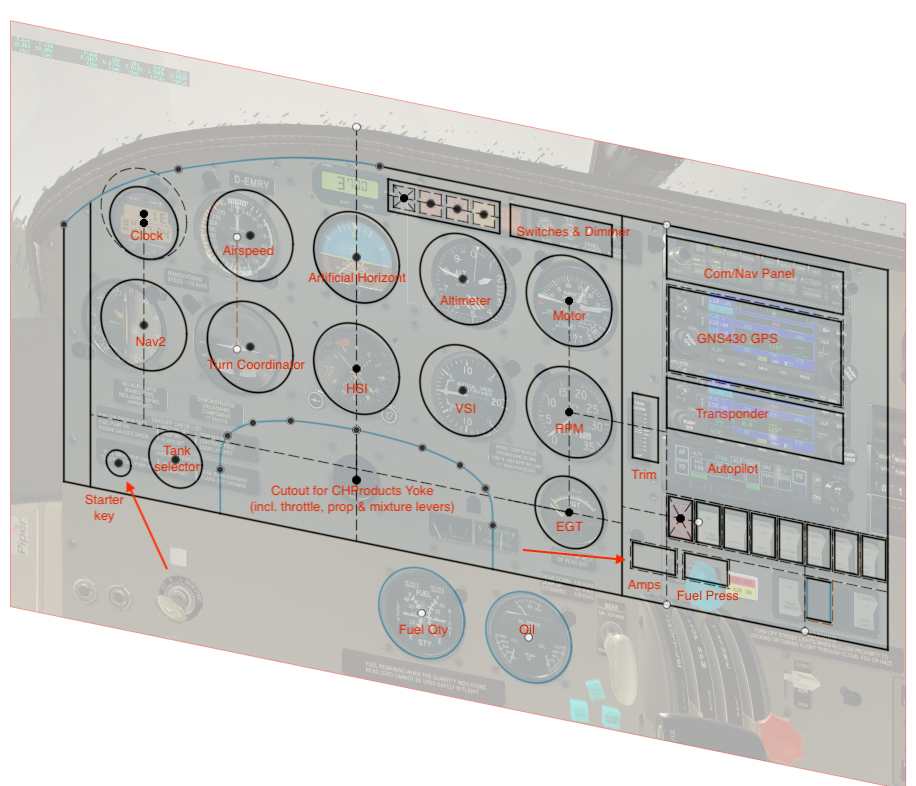
Most instruments will stay in their original positions. Some components needed to be moved, since my dashboard will end at the tabletop. For example, I moved the starter key from its original position slightly “under the tabletop” to a free space above. The same goes for the fuel tank selector, which is originally located down by the pilot’s knee on the left wall of the cockpit, to a free space next to the starter key (I also scaled it down).
I don’t need to build the throttle, prop, and mixture levers, since they are part of the existing yoke assembly. However, I had to move the alternator amp and fuel pressure gauges to make room for the yoke cutout.
There’s no space for the fuel and oil pressure/temperature gauges, which are also originally below the “tabletop line.” I’ll figure something out later.
All the switches for lights and avionics will stay more or less in their original spots.
I’ll fill the electronics stack above the switches (GPS, transponder, autopilot, etc.) dynamically as I build them. They should all have roughly the same width, which means I can rearrange them as needed within a large rectangular cutout, similar to the real dashboard.
The backplate will be made from 5 mm plywood and somehow fixed to the yoke and/or the tabletop, so everything can be set up in just a few minutes. However, the exact structural framework is still unclear at this point.
What’s changed since January 2024?
(As of March 2026)
After I had already designed and built a few instruments (see the posts below that I’ve moved over from the old build log), my YouTube algorithm also started to catch on and kept recommending more and more videos from other DIY home flight simulator builders.
While watching one of those videos - someone giving a tour of their full-size Cessna 172 cockpit in the corner of their living room - my wife walked in and casually asked why I wasn’t building something like that myself. That question came pretty much out of nowhere.
The issue was never whether I wanted to build a full cockpit, the problem was that we simply didn’t have the space for it in our apartment. I tried to explain that to her, and also mentioned that about eight years ago, when I was still living alone, I had actually built a working Stewart platform. However, when we moved in together seven years ago, I had to take it apart due to lack of space, and it’s been stored in the basement of our apartment building ever since.
“But a cockpit like that would be really cool,” she said. “I’m sure we can find a way to make some space.” I love this woman.
A few months later, we finally managed to clear out a spot in our home office. With a bit of “Tetris” involving my desk and a few other pieces of furniture, we were able to free up just enough room for the base plate of the old Stewart platform. It’s going to be a tight fit, but it should work.
And just like that, the tabletop dashboard project described above suddenly turned into a full-size cockpit project, built on a 6-DOF Stewart platform as its base.

This is a photo of the DIY Stewart platform from eight years ago. Back then, I mostly used it for roller coaster simulations and Elite Dangerous (both with a VR headset).
The desk chair mounted on top is gone by now, as is the rather flimsy footrest. The six actuators are still the same (at least mechanically) and so is the main frame on top.
I’m planning to write a more detailed post soon about the Stewart platform and its recent mechanical and electronic overhaul.
As a small teaser, here’s a recent photo of it:


Comments
Post a Comment